The Updox Fax printer will enable you to fax documents from your EHR, a website, or another application.
Note: Updox printers are currently incompatible with ARM-based processors on Windows devices. Our printers will not install on these devices.
Downloading the Installation Files
Depending on your Windows System type, we have two installer packages available. Select the appropriate link to download the zip file.
Windows 64-bit: Click here
Windows 32-bit: Click here
As the file downloads, you can see the progress in your browser's toolbar. 
Right-click the file and open it after the download is complete.

Installation Steps
Updox Fax is installed in two pieces, a print driver and an application.
- Unzip the file to access each installer. This is done by checking the box next to the zipped files and selecting Extract all. Then select your Downloads folder for the destination and click Extract to save both files.

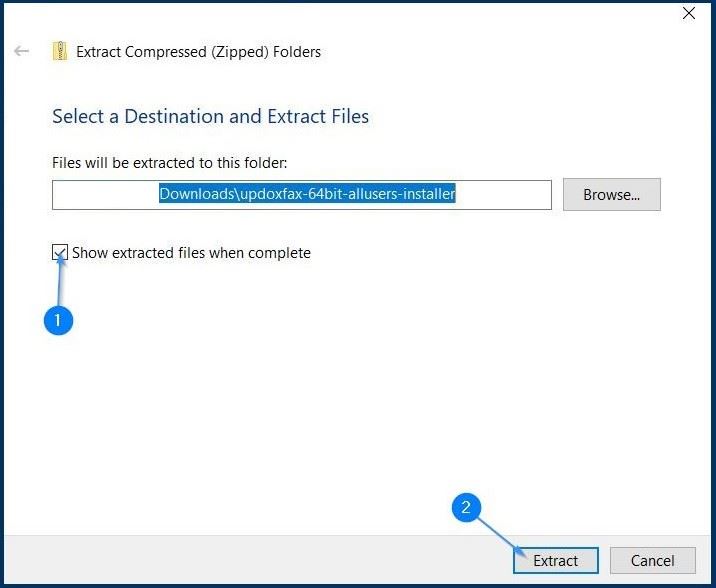
- After selecting Extract All from Step 3, one final window will appear.
a. Make sure the Show extracted files when complete box is checked.
b. Click Extract.
- Install the file labeled “Updox.Printer.Fax.32.bit” or “Updox.Fax.Desktop.64.bit”. When the installation is completed, the installer will disappear and you should have a new printer available in Windows entitled Updox Fax.
Next, install the file labeled “updoxfax Setup”. The file name will also include the version number of the application. When this install completes, the installer will disappear and you will have a new application entitled “Updox Fax”.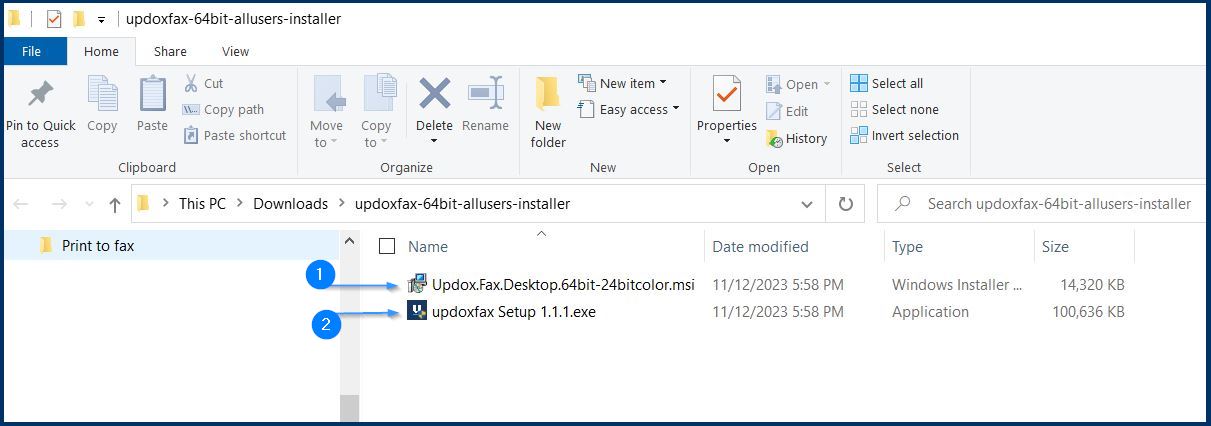


During the installation of both of these files, a security alert may pop up. If so, click “More Info”, then click “Run Anyway”.
The files will be installed. You can view the progress in the setup window.

Updox Fax Warning Messages
When you first open the Updox Fax application you will see a couple of warning messages.
1. “Oh snap! Missing or incomplete configuration. Click here to correct configuration.”

- This message lets you know that the application hasn’t been connected to your Updox account.
- We’ll explain how to connect your printer with your Updox account below in the Updox Fax Settings section.
2. “Oh snap! No pdf specified. Click here to select a pdf now.”

- This message will appear when the application is opened on its own.
- Items can be attached and faxed by clicking on the Click here to select a pdf now link and then selecting the saved document you’d like to fax.
3. “Heads up! An application update is available! Install now.”

- You may also see a blue info box alerting you that an update is available.
- Go ahead and update the application by clicking Install Now.
Click Settings in the lower right of the window to continue.

Updox Fax Settings
Follow these steps to configure the settings for Updox Fax.
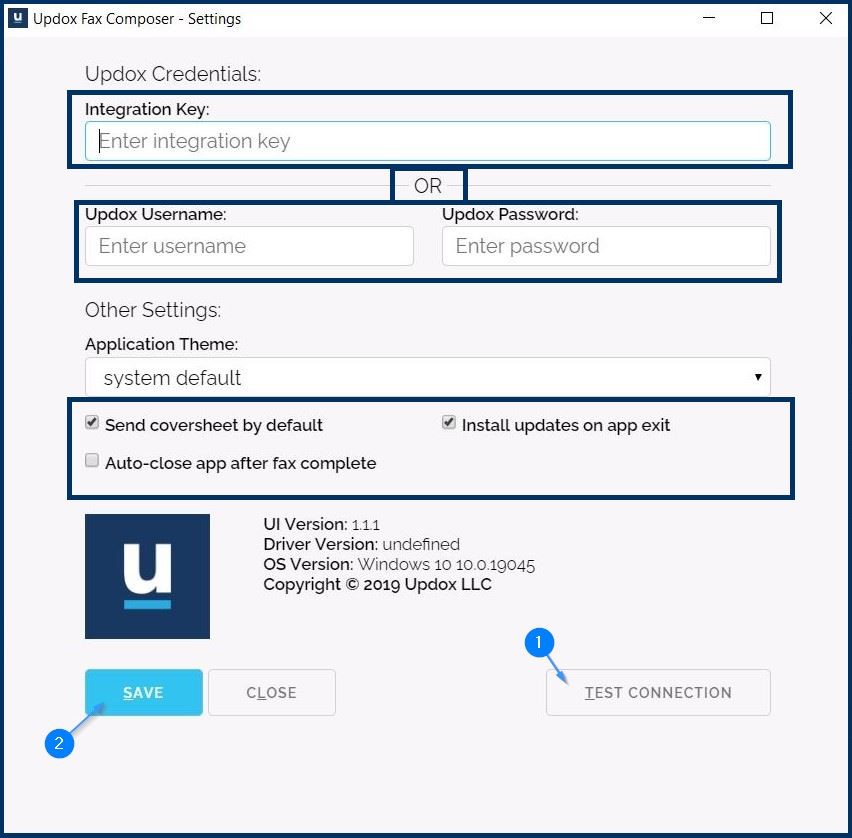
- Updox Credentials Authentication Options:
- To fax items as the Practice, enter your integration key. The integration key is found in the Updox Menu > Admin > Practice Information.
- To fax items privately, you can use your Updox username and password.
NOTE: If you use your Updox username and password to authenticate, you do not need to enter your integration key.
IMPORTANT: Practice Fusion customers will generate their printer credentials under “My Profile” in the Updox Menu.
- It is best to leave Install Updates on app exit checked in order to allow your printer to automatically update if you have access to install software updates on your workstation.
- You have the option to leave Auto-close app after fax complete checked as this will close the app once the fax has been completed, saving you a click.
- In order to ensure that your credentials are correct, click the Test Connection button. Clicking this button will display your practice and/or user in a notification, allowing you to double-check that you have entered everything correctly before proceeding.
- Once your settings have been configured, click Save, then Close.
How to Use Updox Fax
Once Updox Fax has been installed and configured on your workstation, you’re ready to start faxing!
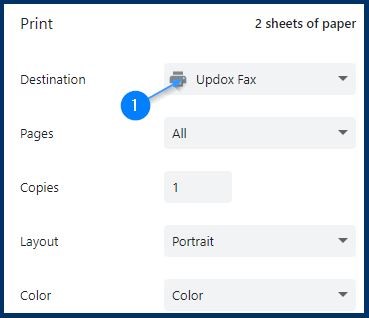
- You can fax items using your new Updox printer by selecting Updox Fax from the print destination menu.

- The Fax Composer will open allowing you to make selections for your fax destination as well as any cover sheet details you’d like to include.
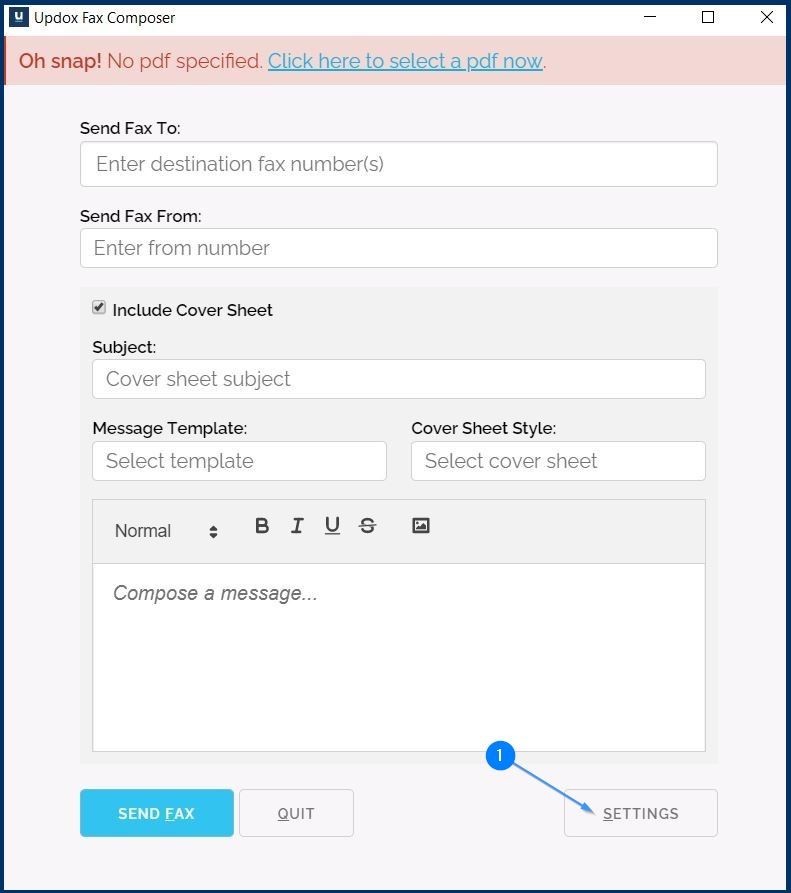
- Enter the fax number(s) and/or contact name(s) from your Updox Address Book under Send Fax To.
- If you’d like to send with a coversheet, check the Include Cover Sheet box then select your preferred Cover Sheet Style.
- After making your selections, click Send Fax to initiate sending your fax.
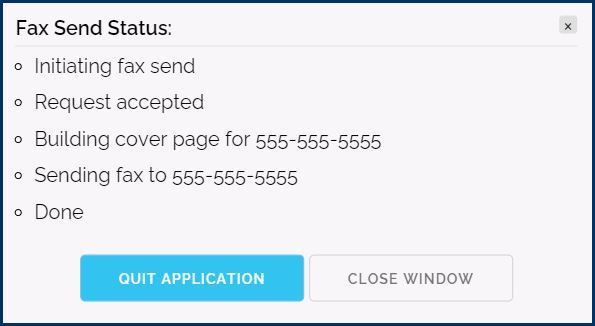
- A small window will pop up to walk step by step through the process. In all likelihood, this window will disappear before you even have time to read it; however, if errors are encountered, this window will provide details to assist with troubleshooting.

- To view your send fax, log into your Updox account and click on the Sent folder.