To create a form in Updox, start by going to Menu - Admin, and select Form Management.

In the Form Manager, you can manage existing and create new forms. Click Add New Form to start a new form.

Step 1:
Name your form. Keep in mind the name you assign to the form will be viewable by the patient or recipient when they access it electronically.
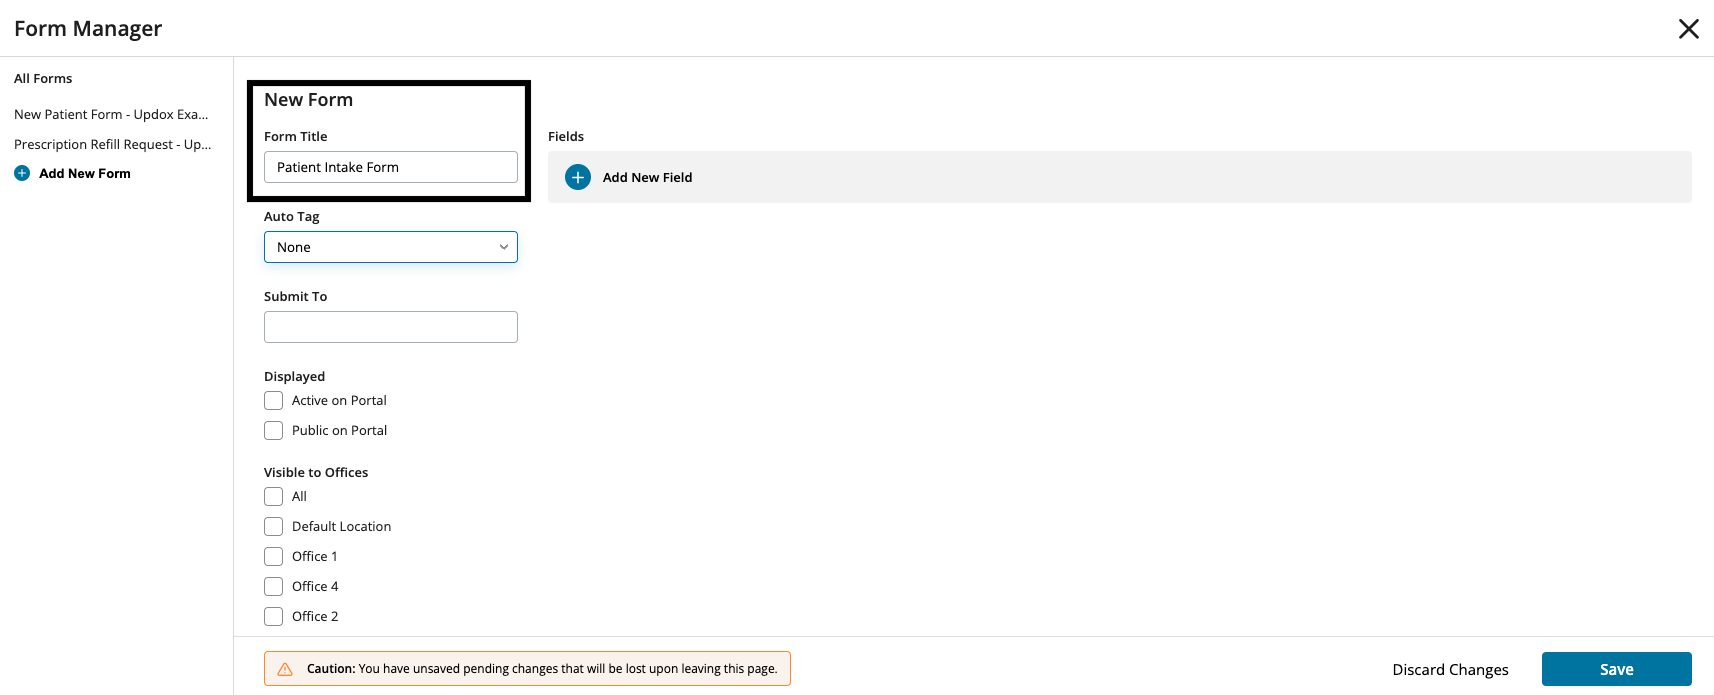
If you do not use the Patient Portal through Updox, you will not see the ‘Active on Portal’ or ‘Public on Portal’.
TIP: If you use queues, you can auto-route the completed form using ‘Submit To’. If you utilize tags, you can auto-tag certain forms so they are filtered appropriately when completed in the Inbox. For example, if you had an insurance updated form, you could submit it to your ‘Billing’ Queue, and also tag it with a ‘Needs Reviewed’ tag.
Step 2:
To start creating your form fields, click on +Add New Field. 
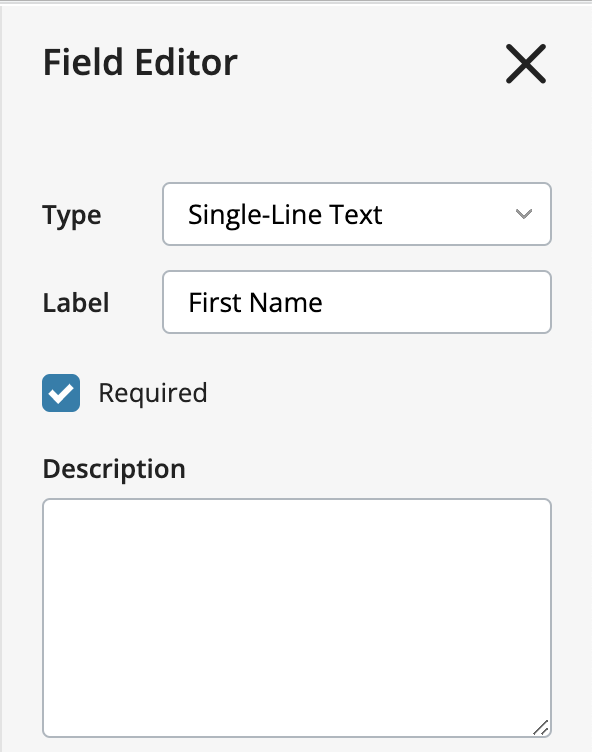
When you add a new field to a form, you’ll be prompted to pick the following:
- Type: How the data entry will be presented to the patient or the recipient.
- Label: This will be what is displayed on the form, such as a question or label for the data field.
- Required: If this is checked, it will force the patient or recipient to fill it out prior to submitting the form.
- Description: You can add help text or information.
Step 3:
When choosing a field type, you will have the following options:
- Single-Line Text: Used for one to two-word answers
- Multi-Line Text: Best more narrative responses
- Date Picker: Presents a calendar picker
- Label/Instructions: Most commonly used at the beginning of a form to provide the patient instructions
- Section Heading: Name a section of a long form. For example “Insurance Information”
- Spacer: Creates space on the form
- Check Box: The patient will be prompted with a checkbox as the answer. For example, the label would be “By clicking this box, I agree that I have read the above statement” and the type would be ‘check box’
- Drop-down List: Type your responses into ‘Values’, one per line. These will then be presented in a drop-down list and only allow a single selection
- Radio Button List: Presents responses (typed in ‘Values’) in a radio button view and is a single selection for the patient
- Check Box List: Presents responses (typed in ‘Values’) with check boxes for the patient to choose and is multi-select for the patient
- Star Rating: Presents a five-star graphic for the recipient to choose a rating
- Signature: Allows the recipient of the form to draw a signature with a mouse or finger on a mobile device
- Image Upload: Allows the form recipient to upload an image file of less than 10MB
- Link: You can upload a link to your form for the recipient to access
Additional Information
Fields are automatically added as you fill out the information.
Once you have your field, click the X and the field will display on the form. Clicking the X will not delete your field. It just closes the dialogue box.
1. Click +Add New Field to create as many fields as you wish on your form.
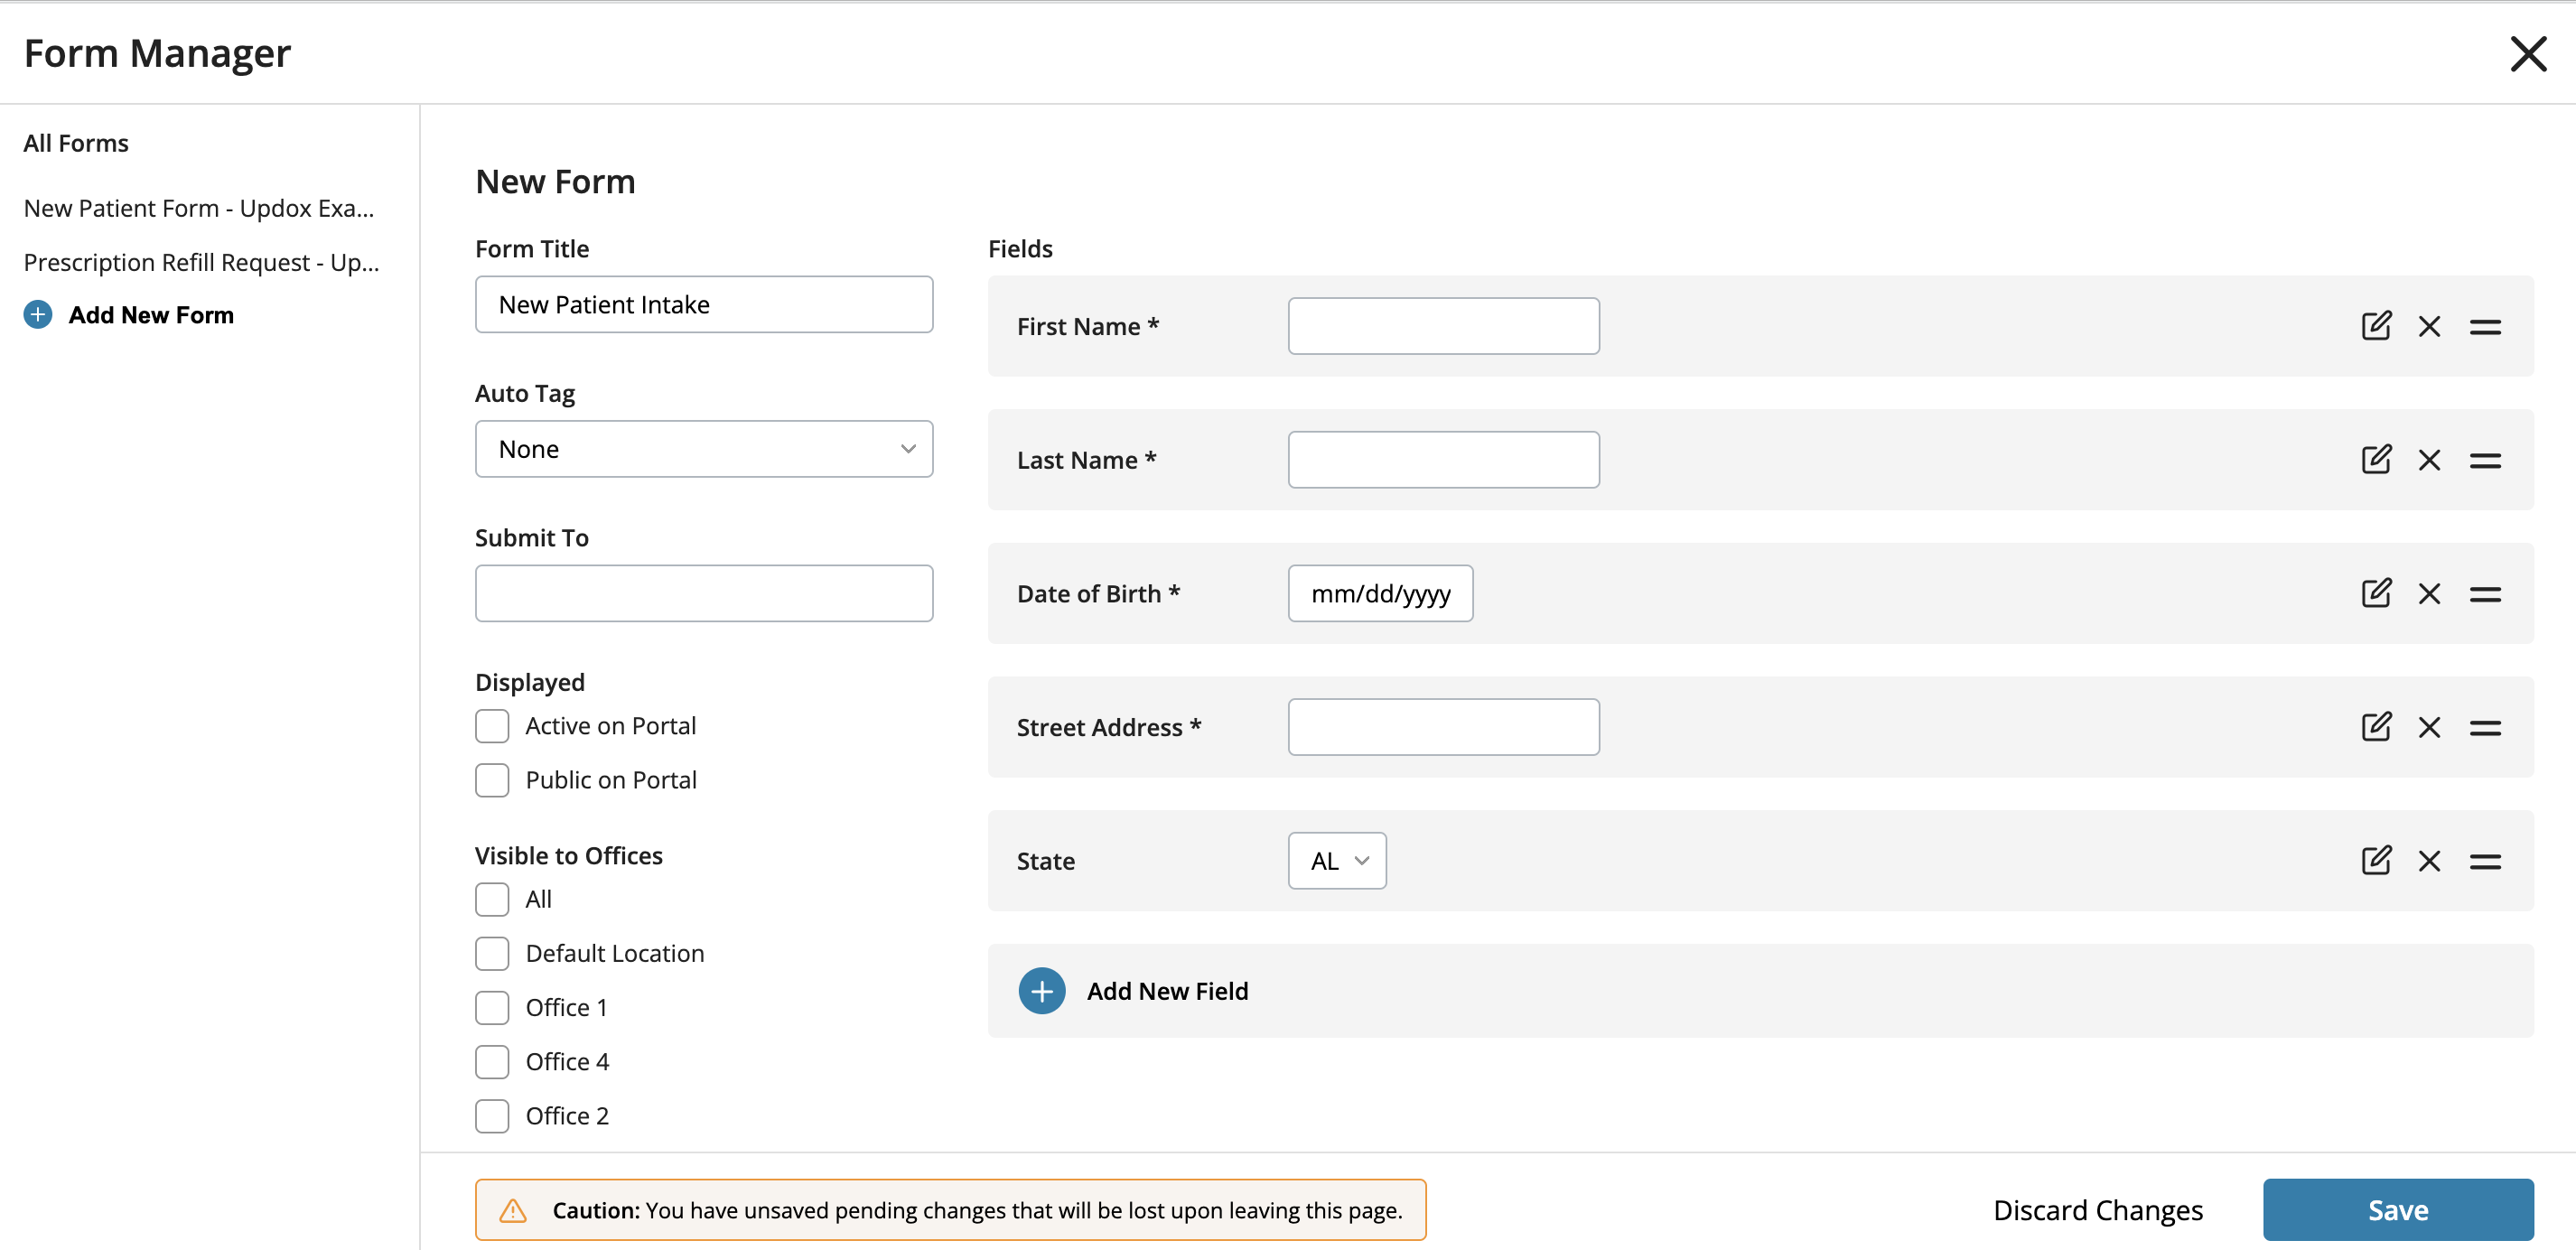
2. Once fields are created, you will have the option to edit the field, delete the field, or move to a different location on the form.
3. Always remember to hit Save at the bottom of the window to save your form!
4. Forms saved will create a unique URL per form. Learn more here with our How to: Access Forms article.