What is an Updox Printer?
To enable outbound faxing from Updox, you will need to install an Updox printer that will allow you to move documents to the Updox Inbox. We call this printing to the Updox Inbox.
Follow these step-by-step instructions for setting up the Updox printer on a Mac Computer:
Step 1:
Open a web browser and go to the Link Here. Download the Mac Printer application.
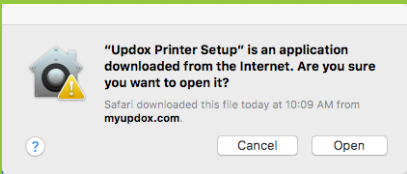
Step 2:
Click on the file named “Updox Printer Setup” to unzip. The file will appear in System Preferences - General.
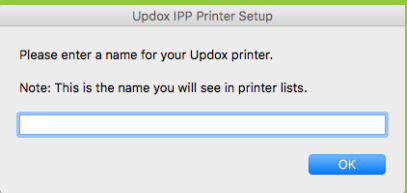
Step 3:
Set the name to Updox Printer, or whatever else you like.
Step 4:
To test your new Updox printer, open an item to print to Updox selecting the newly created Updox Printer. The 1st time you print it will ask you to put in your updox username and password.
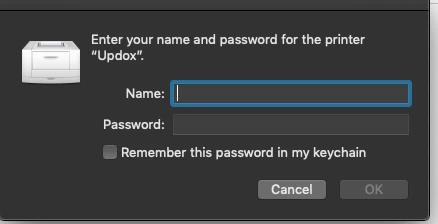
**IMPORTANT** You will be prompted to enter your Updox username and password (this is NOT your Mac Admin user credentials).
For Practice Fusion and DrChrono users, you will need to enter your printer credentials the first time you use the Updox printer. You can find these credentials by going to Menu > Profile. Scroll down to the Printer Credentials. Click the Generate button if your credentials are blank.

Make sure you check the box to save credentials to Keychain!
Any time you change your Updox credentials (printer credentials) you will need to update your Keychain.
Visit support.apple.com for additional Keychain help.