Uploading contacts into your Updox account can give you easy access to contacts in your existing Address Book!
Step 1:
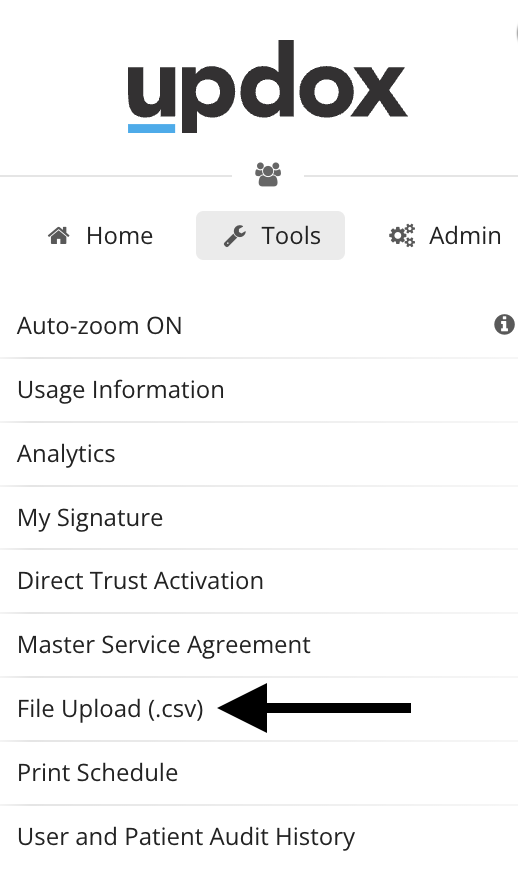
Access the File Upload area in Updox by clicking on Menu, then Tools, then File Upload (.csv)
Step 2:
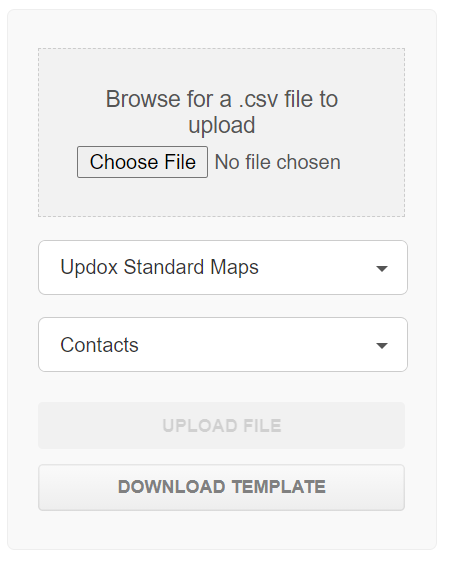
In the first dropdown, choose ’Updox Standard Maps’, then ‘Contacts’ in the second dropdown.
Step 3:
Click ‘Download Template’. A template .csv will open in a separate tab for you to use.
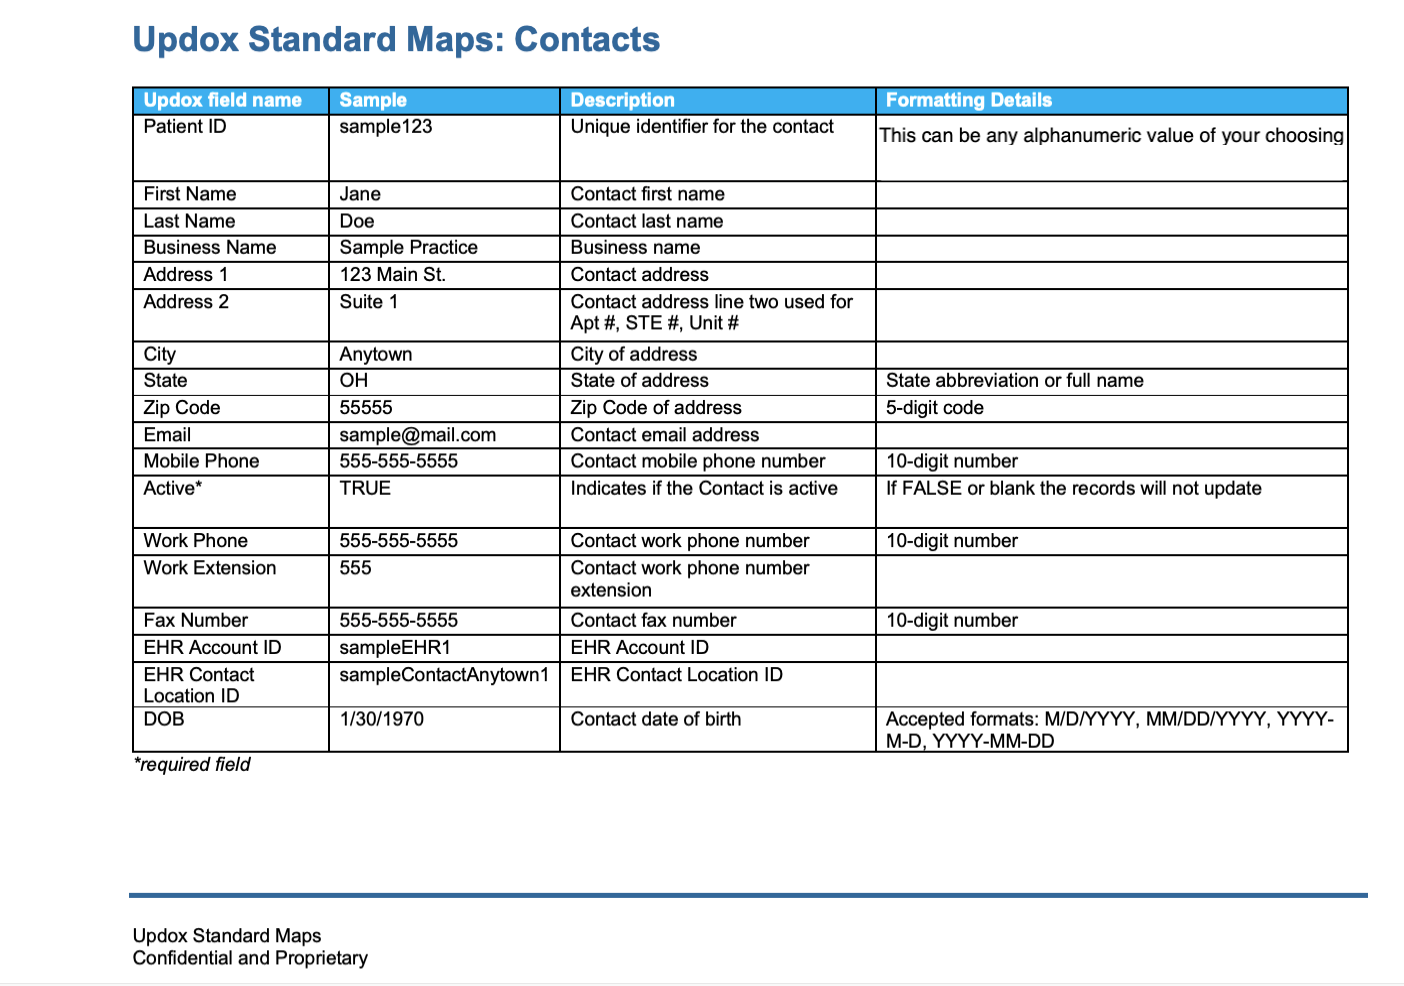
Tip: When you are creating your contact list, you must follow the standard format exactly as displayed, ensuring that all the columns are in the correct order. See the example at the end of this article for detailed information on fields.
Step 4:
After finishing your list, click ‘Choose File’ to upload your .csv.
NOTE: Make sure that ‘Updox Standard Maps’ and ‘Contacts’ are still selected in the two previous dropdown fields.
Step 5:
Your .csv will display under ‘Unprocessed Files’. Once your file is finished processing, it will automatically move to ‘Processed Files’.

Tips for Importing a Contact List via File Upload:
- The first column is labeled 'Patient ID', but don't worry! Use this field to enter a unique contact ID of your choosing in case you need to re-upload a new list with the same contacts.
- If your file fails, check the column order to ensure it matches the template exactly and the format of zip codes match the sample.
- Columns EHR Account ID, EHR Contact Location ID and DOB generally aren't used when uploading your Contact List. You may leave these fields blank for each contact on your list.
- The fax line must be a 10 digit number so please make sure to remove the 1 from the beginning of your contacts’ fax lines.
Contact Mapping Examples: