Updox gives you the ability to customize and schedule your reminders by appointment type. Learn how quickly below!
Step 1:
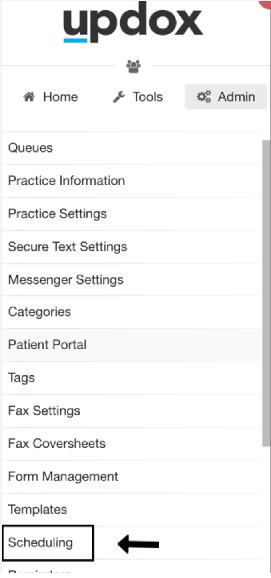
In the upper left hand corner of Updox click Menu - Admin Scheduling
Step 2:
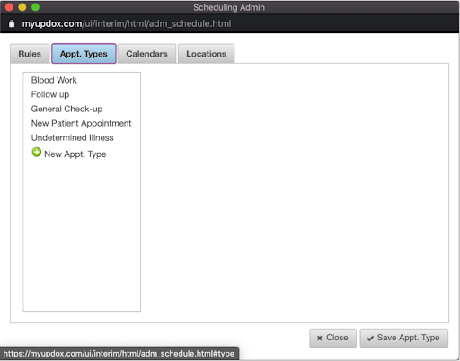
Click the Appt. Types tab at the top, and click on any existing appointment type to make an edit.
Workflow
Patient’s are able to get a fully customized script based on the appointment types you create and choose. For instance, if the patient is getting blood work done, creating a blood work appointment type gives you the ability to specifically state in your script items a patient must bring as opposed to a general check up or even a new patient appointment.
Step 3:
You can edit your Appointment Type name and select the script type you would like to go out. Click save at the bottom once you have completed all edits.

Tip: You can choose to not send any reminder to a specific appointment type by checkmarking Don’t send reminders for this type of appointment. You can also prevent a patient from being able to self schedule with a specific appointment time by unchecking Patient can View/Select. Checkmark Don't send reminders for this type of appointments if you wish to avoid sending a reminder altogether.